There are a lot of steps and processes that go into smoking a delicious brisket on a pellet grill or any smoker. From picking out your piece of meat to slicing the finished product, here’s a complete brisket on the pellet grill smoking guide telling you everything you need to know to make your brisket a crowd favorite.
Step 1 Choose a Brisket
Brisket Grades

When you shop for your brisket, you’ll notice that there are 3 USDA grades to choose from Select, Choice, and Prime. As with many things in life, you get what you pay for when you buy meat. Don’t pick select! It is tough to make a great brisket out of Select.
Go with at least Choice but go with what you can afford. Most people have access to a Costco, which typically sells Prime brisket for a reasonable price. You can find a prime brisket for around $60, which will help you make an excellent final product.
Select
Select is the lowest grade. You can find this at your local grocery store or restaurant chain.
Choice
Choice will bring more flavor and tenderness. You can find a Choice brisket at supermarkets and butchers.
Prime
Prime is the highest grade of meat. You can find this option at high-end steakhouses and your butcher.
The higher the grade, the higher the tenderness, juiciness, marbling, and flavor. This is due to the increase in fat content. Prime has the highest amount of fat while Choice has the lowest.
You will get the best flavor and tenderness if you use Choice or Prime grade brisket because it has more marbling throughout the meat.
Chef’s Tip
Choose a Brisket Size
A 12-pound whole packer brisket yields 12 servings, which gives you about 6 pounds of meat to serve.
Plan on about 1 pound of raw meat or more per person. There will be a considerable loss of weight after you trim and cook. You will lose up to 20% of the brisket’s total weight due to fat trimming and up to 30% from shrinkage. You will then end up with about half a pound of brisket per person.
Step 2 Smoking Brisket on Pellet Grill Speed Options
Option 1 – Low & Slow (Preferred)
Likely the most common brisket cooking method is going low and slow. This method calls for smoking your brisket in your pellet grill between 225-250°F and smoking for around 18 hours. You can generally plan on about 1 hour to 1 hour & 15 minutes per pound of meat since many factors affect the length of time it takes to cook the brisket, including meat size, tenderness, etc. It is impossible to know precisely when it will be ready.
Option 2 – Hot & Fast
This method is growing in favor, and it’s a good option for those who are short on time. When using the hot and fast process, you will set your smoker between 300-350°F, and your brisket may only be in your grill for 5-6 hours. Even though you can get an excellent brisket result in half the time, there is a greater chance for error and overcooking. You will also miss out on that great smoky flavor that comes from cooking your brisket longer.
![Personalized Science T-Shirt, [NAME] Eats Bacon Periodically, Science Gift For Teachers, Gift For Dad](https://i.etsystatic.com/39088648/c/677/537/250/479/il/81da41/5524136388/il_170x135.5524136388_ejht.jpg)
![Personalized Funny BBQ Gift T-Shirt, [NAME] Likes To Smoke Food It Gives Him A Reason To Play With Fire, Gift For Men, Gift For Dad](https://i.etsystatic.com/39088648/c/715/567/310/398/il/df3b57/5524134348/il_170x135.5524134348_l4vh.jpg)
![Personalized Funny BBQ Gift T-Shirt, [NAME]'s Addicted To Smoking, Gift For Men, Gift For Dad](https://i.etsystatic.com/39088648/c/688/546/321/419/il/04f17e/5572258249/il_170x135.5572258249_loz4.jpg)
![Personalized Option Funny BBQ Gift T-Shirt, Don't Worry I Got This I Watched A YouTube Video, Quite by [NAME] Gift For Men, Gift For Dad](https://i.etsystatic.com/39088648/c/1451/1152/714/207/il/eecec9/5524515802/il_170x135.5524515802_qbvj.jpg)


![Personalized Funny BBQ Gift Mug, Don't Worry I Got This I Watched A YouTube Video, By [NAME], Gift For Men, Gift For Dad](https://i.etsystatic.com/39088648/c/2982/2368/0/27/il/cf62b0/5272771721/il_170x135.5272771721_pz0h.jpg)

![Personalized Science Apron, [NAME] Uses [Pronoun] Smoker Periodically, Science Gift For Teachers, Gift For Dad](https://i.etsystatic.com/39088648/c/2982/2368/0/9/il/6bf723/5272542103/il_170x135.5272542103_18nf.jpg)
Step 3 Choose Your Wood or Pellets

Different woods will burn differently, so not any wood will work for smoking a brisket on your pellet grill.
I suggest Mesquite or Oak pellets for a more classic and bold flavor. For more of a sweeter touch, try Cherry or Apple. However, if you’re unsure which wood to pick, a “competition” blend is a safe option.


Step 4 Trimming the Brisket
Trimming your brisket is crucial. Sure, you could get away without doing this step, but some fat will not render, so it helps to remove a portion.

Step 1: Grab a sharp knife.
A simple first step. Using a sharp knife will make your job much more comfortable. The ideal knife you want to use is a narrow curved boning knife, but you can use something similar.
Step 2: Carve a Cold Brisket
A good tip is to carve the brisket before it gets too warm. The fat will be much easier to slice, helping you avoid injury.
Step 3: Remove the Silver Skin
Try to remove as much of the silver skin as you can. While trimming the fat, you need to discover a happy medium between too fatty and too lean. Either can result in a dry brisket after smoking. It would help if you planned on leaving about ¼ inch of fat.
Step 4: Burnt Ends
If you plan on making burnt ends, save some of the softest fat to use later.
Step 5: Optional Separation
At this stage of trimming your brisket, you may choose to separate the point from the flat. This is an excellent option if you want to make delicious burnt ends.
Separating the two will give you a relatively uniform flat in thickness so that it will cook more evenly. Separating the two parts doubles your surface area, which will create more bark. Separating also gives you the bonus of having more sides to apply your rub, and you will be able to get an all-around smoke ring. Doing this, you’ll cook the point and flat side by side.
Remember that the point is thicker and will cook longer. Use a probe thermometer in both the point and flat. Doing this will also speed up cooking time and cut out about ⅓ of the time it would take to smoke a whole packer.

Step 5 Seasoning for the Brisket on Pellet Grill
Perhaps the most repeated way to season a brisket for smoking on the pellet grill or smoker is the Texas-style method of using a salt and pepper rub. Combine equal parts of kosher salt and coarse ground pepper to make this. This blend is occasionally used by smoking purists and may not be the best choice for you if you’re using a pellet grill.
Preferably, salt the meat about 12 to 24 hours in advance, so it has time to work itself into the fibers. Adding this time will allow the brisket to hold onto the moisture and enhance its flavor.
A common mistake when seasoning brisket is going simple with only salt and pepper. If you’re using a big offset smoker, salt and pepper are a great way to go since your meat will get a ton of smoke flavor. However, you won’t get as much smoke flavor if you’re smoking brisket in a pellet grill. You’ll still get great taste, but it won’t be as strong as a large or small offset smoker.
When smoking brisket using a pellet grill, it’s a good idea to use rub blends instead of going simple. Remember that you don’t want to go overboard and use too much rub. Those fine particles covering the brisket’s entire surface will make it difficult for the smoke to penetrate. This will cause you to have a less smoky flavor.
Step 6 Injecting the Brisket
Using an injector will allow you to add flavor and moisture past the meat’s surface. Popular liquids used include beef broth, soda, alcohol, and butter. I recommend injecting anytime you smoke a brisket. The meat takes a long time to cook, so adding extra moisture helps keep your brisket juicy.
Push in about 1 oz of liquid per pound of meat. The weight is determined after you go through the trimming step.

Insert the injection needle parallel to the grain of the meat. Push in the plunger while simultaneously pulling it out of the meat.
Take note of the fibers’ direction so you can carve the meat perpendicular to the grain.
Chef’s Tip

Step 7 Should the Brisket Start Cold or Warm?
The debate continues whether placing your brisket for smoking in your pellet grill while the meat is still cold is better than waiting for the meat to warm to room temperature.
Many believe that the smoke adheres to the cold meat better, which results in a better smoke ring. That might be true, but others argue that letting your brisket warm to room temperature for about an hour will yield a more tender result.
Step 8 Set Cooking Temperature for Smoking Brisket
The temperature you want to set your smoker depends on what smoker you are using. A common mistake is not using the correct temp.
When smoking a brisket on a pellet grill, set it to 225°F if you’re going low and slow. Set it to 300-350°F if you decide to smoke hot and fast. Here are the smoker temps to follow for all other smokers:
Small off-set smoker: 250°F
Big off-set smoker: 275°F
Ceramic cooker like a Big Green Egg: 225°F
Weber Smokey Mountain or Weber Kettle: 225-250°F
Learn more about why you want to use these temperatures and other common brisket mistakes by reading: 12 Common Brisket Mistakes.
Step 9 Plan Out Your Cook
When Will the Brisket be Ready?
A widespread mistake is not adequately planning out when your brisket will be ready to serve.
Let’s say you plan out that it will take 10 hours to smoke, an hour to rest, and when your guests are ready to eat, 30 minutes after that. Inevitably things will go wrong. Many variables come into play when cooking outside, which can throw off your smoking time, causing your brisket to take longer to cook.
Always plan out an additional two and a half hours when smoking a brisket. Adding more time will help ensure you’re serving delicious meat on time. With a brisket, you can always let it rest for hours in a cooler, and you’ll be just fine.
The rule of thumb for smoking brisket low and slow accounts for about one hour to one hour and 15 minutes per pound.
Make sure to keep the lid closed as much as possible. If you’re spraying, mopping, or checking on the meat for any reason, do so as quickly as possible.
Plan on 12 to 18 hours if wrapped when it reaches 150°F, or 16 to 20 hours if naked. Keep in mind that it isn’t the brisket’s weight that determines how long it takes to cook, but the thickness, along with many other variables.
Since there are too many variables in play, we can’t give a precise cooking time. However, plan on ending with a lot of time to spare before you serve. You can use the resting period to ensure you eat your brisket hot and ready.
Step 10 Best Brisket Placement
It’s also debatable how to place your brisket in your smoker. Assuming you didn’t separate the point from the flat, you need to decide how to put your whole packer onto the grill grates.
Some will place their brisket fat side up, thinking that the juices will re-distribute and add additional moisture once the fat renders. Others will put it fat side down to protect the meat. We’ve tested both methods and consulted with many others regarding both ways, which comes down to your personal preference.
Step 11 The Stall
When you hear about “The Stall,” it refers to a period when the brisket’s internal temperature plateaus or stops rising. This stall usually happens around 160-170°F and can last up to four hours.
The stall occurs when the brisket’s internal temperature gets closer and closer to your smoker’s temperature. As the fat begins to melt, evaporation begins. As a result of this moisture evaporating, it ends up cooling the meat.
The added smoking time this causes is why many people will take the brisket off the smoker at this point and wrap it.
Step 12 Wrap the Brisket (Optional)

Taking the time to wrap your brisket comes down to your personal preference. We prefer to wrap, and it is popular because doing this will help retain moisture, prevent burning or drying, and most notably, it will push you through the stall much faster. Once you notice the brisket has stalled, usually around 160-170°F, it is time to wrap.
Time for another debate. Do you wrap in butcher paper or tin foil? Before exploring those options, you may decide not to wrap.
Naked
By leaving the brisket unwrapped, you add more to your cooking time. However, you can come away with a more smoky flavor and bark.
Butcher Paper
Using butcher paper over tin foil, you can continue getting smoke to your brisket since the paper allows the meat to breathe and not dry out. Also, along with breathability, you’re getting direct heat penetration. Paper will help you develop a nice thick bark.
Many people will wrap it loosely if you’re using paper, but this causes leaking and doesn’t work well. Make sure to wrap it tightly.

Tinfoil (also spelled Tin Foil if you’re wondering)
Using tin foil to wrap your brisket will help the meat retain more moisture and leave it with a bit of a pot roast feel along with a softer bark.
If you’re using foil, make sure it is nice and tight so steam isn’t escaping. Since you’re choosing foil, you don’t want to lose any of that steam, so make sure to use the foil the way it was intended.
Conclusion
It comes down to your preference, so feel free to experiment. Not wrapping gets you the best bark, smoke, and intense flavors.
Using butcher paper or tin foil cuts hours off your cooking time. Using butcher paper lets some of the moisture escape but traps in most of the rendered fat.
Wrapping in tinfoil makes moister meat with a different texture, similar to a pot roast.
The difference is subtle in the end and comes down to your own choice.
Whatever your choice, make sure you wrap tightly, so you’ll achieve the purpose of why you’re covering in the first place.
Step 13 Spray the Brisket
I don’t suggest continually checking on your brisket. If you’re looking, you’re not cooking. The benefit of smoking a brisket on a pellet grill over an electric or propane option is the convenience of not needing to use a water pan.
If you don’t wrap your meat, you should be spraying it regularly. Spraying begins by putting a combination of liquids of your choice into a spray bottle and evenly spraying your brisket every hour. You can also use a mop to coat the meat with the same fluid.

I suggest using equal parts of apple juice, apple cider vinegar, and water. Another option if you’re wrapping is to mop on some sauce just before you wrap your brisket.
Don’t Spray the Fat
A common mistake is spraying the entire surface of the brisket. When you spray your brisket, don’t spray the fat. You want the fat to get hot and render. You’re spraying the meat to protect it, and the fat doesn’t need saving. If you get some liquid on the fat, it isn’t a big problem.
Step 14 Know When the Brisket is Ready

You need to monitor your brisket’s internal temperature. Its internal temperature should be around 195-205°F at the time you pull it off the grill.
Top competitors will tell you that 203°F is the sweet spot, and something incredible happens around this number. We tend to agree with this. Around this temp, a probe will break through the bark and slide effortlessly into the meat like your pushing it into butter.
Make sure you don’t go above 205°F, even if you don’t have a tender brisket. By continuing any further, you will only begin drying out your meat.
Point vs. Flat Temps
If you separated the point from the flat, you should have a probe thermometer in both. You’ll notice that the flat finishes sooner than the point. When the flat reaches temp, you can pull it off and leave the point on the smoker to finish.
If you keep them attached, you can either leave them on the smoker until the point has reached temp or cut off the flat and return the point to the smoker until it gets 203°F.
Step 15 Rest
You need to rest your meat for at least 30-60 minutes; however, you can safely rest your brisket for up to 6 hours.
Make a faux cambro – a plastic cooler lined with a towel, blanket, or newspaper. Place your brisket in the cooler and on top of the lining if you wrapped it. If the paper is leaking, you can place your meat, still wrapped, in a large pan before putting it into the cooler.
Leave your probe thermometer in the meat, close the lid, and let it rest until you’re ready to slice and serve. If you have a good cooler with a tight seal, it should keep the meat warm for a long time. Waiting until the temp drops to 150°F is best, but take out and serve before the temp drops for several hours below the safe serving temp of 140°F.
A common mistake is not resting the brisket long enough. Here’s a list to guide you on how long to rest the meat from the article: 12 Common Brisket Mistakes.
Smoked for 8 hours or less – I’d place it in a cooker and allow it to get down to serving temp slowly.
Smoked 8 – 12 hours – Pull the brisket off the smoker and allow it to come down to about 180°F, then allow it to rest in a cooler.
Smoked for 12+ hours – Remove the brisket from the cooler and allow it to come down to about 165-170°F, then place it in the cooler to slowly come down to serving temp.
Step 16 Slicing

Vital that you don’t slice until the last minute. The brisket dries out very quickly after it’s cut.
Your first step is to place the meat, so it is fat side up. That way, the juices will run onto the mat while you slice.
Now it’s time to slice, so locate the flat and the point. Slices should be about ¼ an inch on the flat and just under ½ an inch on the point.

Begin slicing on the flat side, making sure to cut against the grain. While you work your way towards the point, you’ll notice the grain will slowly change. Adjust your slicing, so you keep cutting against the grain. Now continue slicing through the point.
Important: By cutting with the grain instead of against it, your brisket will taste stringy and chewy.
Step 17 Serving
As mentioned before, serve the meat right away after slicing. The sauce shouldn’t be needed if your meat is juicy. However, if you want to use a sauce, I recommend not using a sweet option.
You can heat your sauce or the jus from the foil to serve alongside your brisket. However, if you serve the jus, make sure to taste it because it might be too salty. If that’s the case, dilute it with warm water or unsalted beef broth.
Storing & Leftovers
Keep in your fridge for as long as 4 – 7 days. It will also keep in your freezer for 2-3 months before losing its moisture and flavor.
Try using your leftovers to make a brisket sandwich or chili.
Burnt Ends

Burnt ends are delicious, flavorful, bite-size crispy meat cubes. You make this from the point of the brisket. You can use the entire tissue or turn part of it into burnt ends.
Step 1: Using a frying pan, render about ¼ pound of your trimmed fat.
Step 2: Cut the point into ½” to ¾” sized cubes. Set aside any of the pieces that are too fatty and just eat them.
Step 3: Place the cubes into the pan and gently fry them until they are crunchy on the outside. Make sure you are turning them regularly.
Step 4: Drain the fat from the pan and add about ¼ cup of BBQ sauce and ¼ cup of any drippings you were able to save. You can do this either by having wrapped it in tin foil or through some other means.
Step 5: Place the pan back into a hot smoker or oven and close the lid.
Step 6: Stir the bits every 5 minutes or so. You are allowing the bits to absorb much of the liquid and begin to sizzle. Don’t let them burn.
Step 7: Once done, keep them warm in your faux cambro with your brisket flat.
If you’d like learn how to avoid making mistakes, read 12 Common Brisket Mistakes Everyone Should Avoid.
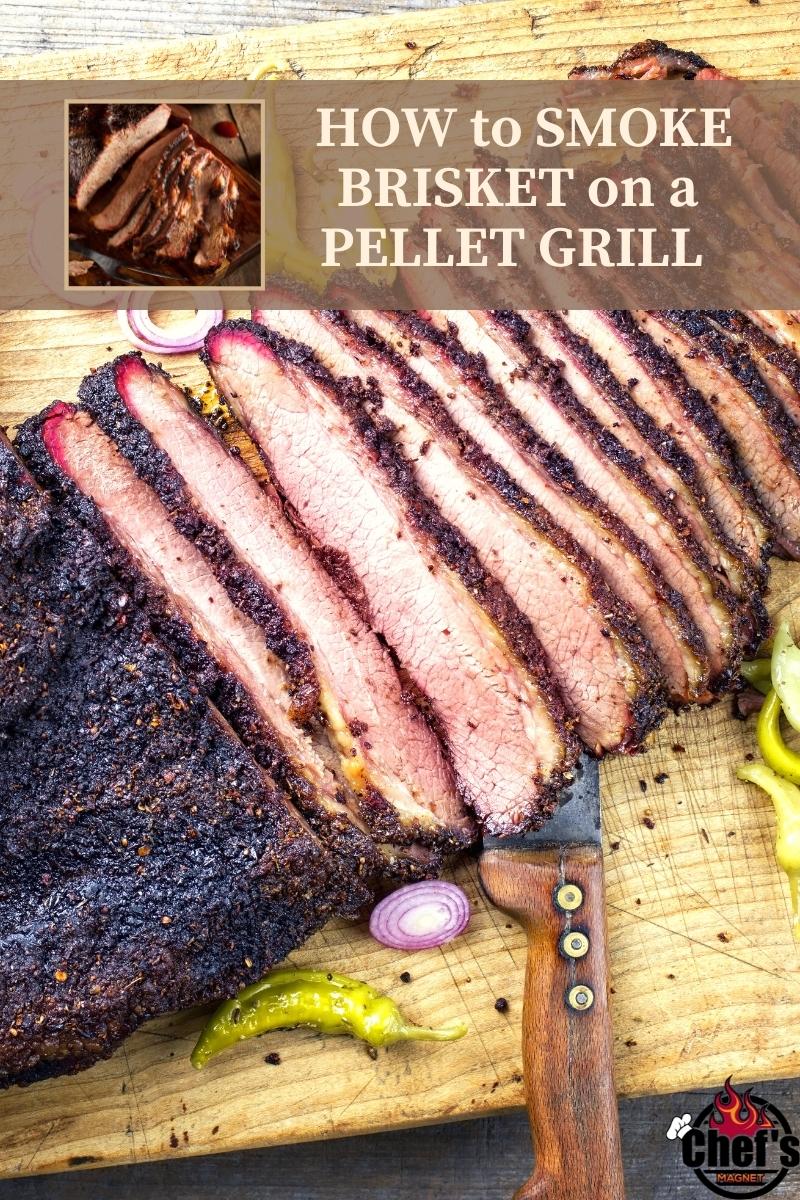
Below is a Pinterest friendly photo…. so you can pin it to your Smoking Food Board!!
