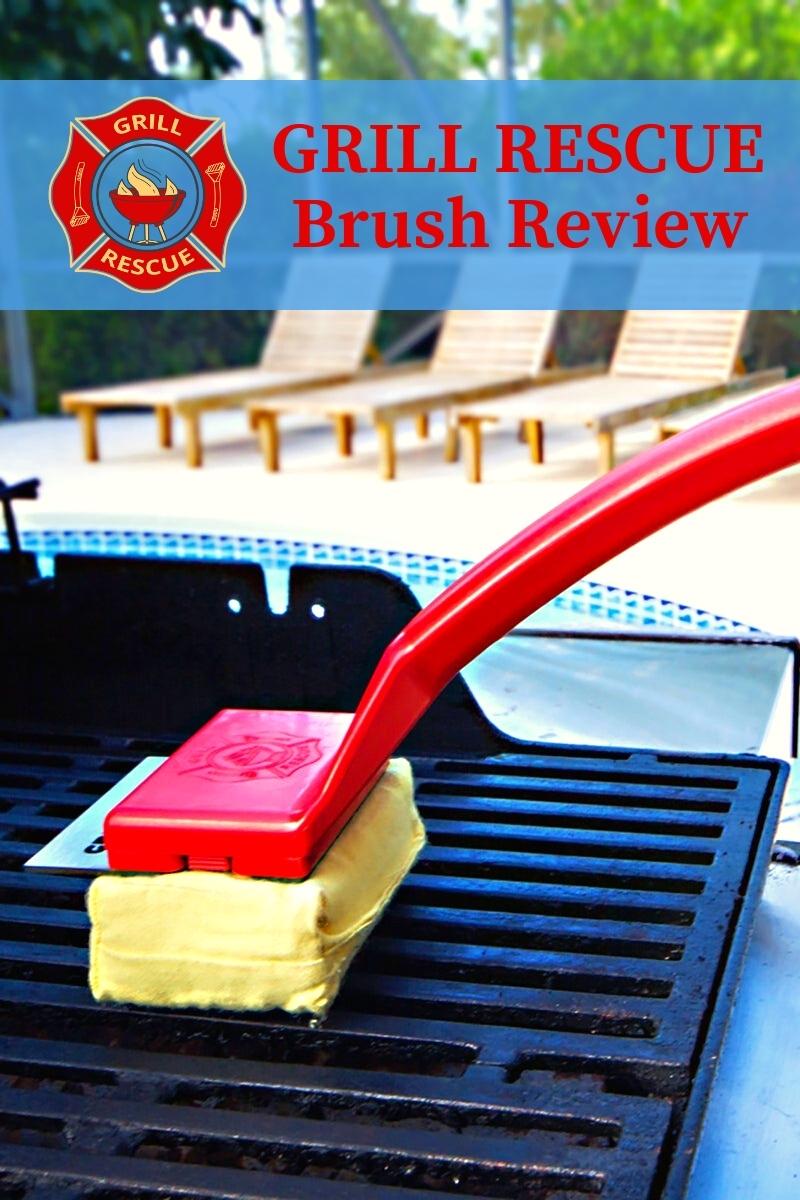
There are a lot of cleaning brushes on the market. I’ve used several of these options for years and haven’t been overly impressed. Then I found the Rescue Brush on Kickstarter. Wow, did this catch my attention? Immediately I pledged and awaited the arrival of this new cleaning brush. It’s funny how it’s called a brush when it’s more like a sponge. Maybe call it a “bulletproof” sponge? After several uses, I really enjoy using the Rescue Brush! Here is my complete Grill Rescue brush review, along with why I bought, used, and promoted this innovative product.
I’ve used typical cleaning brushes on the market and found that they either didn’t clean my grill grates well or I risked leaving tiny sharp needles behind that could get into my food and potentially into my body. Brush needles are a concern that sends many people to the hospital. The Grill Rescue solves both issues by cleaning your grill well while doing it safely.
I purchased the handle with several replacement heads when I pledged on Kickstarter. Since receiving my order months ago, I’ve used the Grill Rescue several times. Here’s what I found.

3 Reasons to Buy a Grill Rescue Brush

1 – Durable
The brush head is constructed of strong Amarid Fiber, which is heat resistant. It can’t melt, and it is 5x stronger than steel! Amarid Fiber is the stuff found in bulletproof vests, so you know it’s strong. Is the Rescue Brush bulletproof? I’m not going to find out, and I suggest you don’t try to find out either.
The handle is composed of polypropylene, which is also durable and heat resistant. It won’t begin to melt until the plastic gets to around 340°F. The metal surface of your grill grates will get that hot, but the handle will never come close to reaching that high of a temperature.
2 – Easy to Use
Well, not as quick as picking up your steel cleaning brush and giving your grill grates a short once over. However, I’ll add a little more time to my cleaning if it guarantees safety.
After the first few cleanings, I got into a good routine. When it isn’t Winter, I will use the garden hose to wet the Rescue Brush. First, I pour water over the brush head, glide it over part of my grill grates, and repeat. I do this until the entire surface is clean. It only takes a minute.
3 – Easy to Clean
You can pop off the head and clean it in the dishwasher. I like to wash mine in the sink, set it outside to dry, then put it away, ready to clean another day again. I’ll bring it inside to dry next to the kitchen sink if it’s winter.
That’s why I’m impressed with the Rescue Brush.


![Personalized Funny BBQ Gift Mug, Don't Worry I Got This I Watched A YouTube Video, By [NAME], Gift For Men, Gift For Dad](https://i.etsystatic.com/39088648/c/2982/2368/0/27/il/cf62b0/5272771721/il_170x135.5272771721_pz0h.jpg)


![Personalized Science Apron, [NAME] Uses [Pronoun] Smoker Periodically, Science Gift For Teachers, Gift For Dad](https://i.etsystatic.com/39088648/c/2982/2368/0/9/il/6bf723/5272542103/il_170x135.5272542103_18nf.jpg)

Here are 4 Steps on How to Use the Grill Rescue Brush:
Step 1 – Heat the Grill
Preheat your grill to a minimum of 400°F. Remember that the metal grates will get hotter than 400°F when your grill is set to a lower temp. All you need is hot grill grates to help the brush be more effective. For safety, turn off the burners once your grill is hot. I don’t turn them off, but it’s your choice. If you use a pellet grill like I usually do, there’s no need to turn it off while you clean.
Step 2 – Wet the Brush Head
The head or sponge needs to be wet. You can dunk your brush in a bowl of water, even push it down, so it takes on more water. Or hold it under running water.
I use my hose to run water over it since that’s quick and easy. Except in the winter, I’ll use a bowl of water to pour over the brush.
Step 3 – Wipe Grates Clean
Immediately after the brush head is clean, gently or vigorously stroke your grill grates, wipe all the grime, and gunk away through an excellent smooth gliding action. It uses steam to clean, so push down as you stoke. More water will be released by pushing down on your grill head while you clean, creating more steam. That’s what the water does for you. A hot grill and moisture will work together for a better clean.
I was surprised at how smooth the gliding felt when I used the Rescue Brush. I was accustomed to pushing down hard to scrap the gunk off the grates with my wire brush. Using the Grill Rescue was a pleasant change.
Step 4 – Dry the Brush
Once you’ve done cleaning your grill, it’s time to dry. Just sit the brush, with the head still in the handle, somewhere to air dry. Outside is a perfect choice if you don’t have freezing winter weather. Otherwise, you can leave it next to your kitchen sink. Once dry, move it to where you store it for next time.

How To Clean the Grill Rescue Brush
Detach the cleaning head from the handle and clean it in the dishwasher, washing machine, sink, hose, or a similar method. We found the best way to clean the pad is by hand with soap and warm water. Then leave the pad to dry either outside or inside. Here’s a quick review of a few cleaning options.
Dishwasher
The easiest way to wash your brush head is by placing it in your dishwasher. The heat won’t be a problem. If you’re worried about the grease, rinse it off first.
Washing machine
Using the washing machine can be as simple as using the dishwasher. Toss it in and run as usual. If you’re worried about the grease, rinse it off in the sink before throwing it in.
Hose
Using the garden hose is a convenient way to clean your brush while you’re still outside cooking. You can also use soap if you want to get a better clean. Just make sure to rinse all the soap off. The last thing you want is soap on your food.
Hand wash
Just like using the hose, you can also use your outdoor or indoor sink to wash the cleaning head by hand like you would any garment.
Commonly Asked Questions
How often should you clean your Grill Rescue Brush?
You should not have to clean the pad for about 4-6 months for the average griller, but you can clean after every few uses if you prefer.
How often do you need to replace the brushes?
I haven’t had to replace one yet. Since these were constructed of solid material, the Rescue Brush will last long. You won’t need to replace it until you see a rip or hole form. At that time, throw it away and clip a new brush head onto the handle.
Conclusion
This is the best grill cleaning tool I’ve used. From its easy gliding action, as you push it across the grates, to the fact it doesn’t use dangerous metal bristles, this is the cleaning brush of choice.
Now that you know how to keep your pellet grill clean give this a try after smoking a delicious brisket. I’ve outlined all the steps to follow to ensure you cook a perfect brisket in this complete guide.
Below is a Pinterest friendly photo…. so you can pin it to your Smoking Food Board!!
