This is your complete guide on how to smoke a turkey on a pellet grill. Smoking a turkey at home isn’t hard once you have steps to follow. Use this guide, and you’ll make a delicious turkey for you and your guests. If this is your first time smoking a turkey or you’ve done this multiple times, you can benefit from going through these steps.
This guide was created by researching what the experts did. Then I picked apart and studied their differences and considered my own experience to develop the ultimate guide. At the end of the steps, I included commonly asked questions that will help you in your quest to smoke the most delicious turkey your guests have ever eaten.
The purpose of this article and website is to bring you guides on how to cook on a pellet grill. However, this guide can be easily adapted to work for gas, charcoal, or other grills. The most important thing you need out of your cooker is the ability to cook over indirect heat, maintain a consistent temperature, and the ability to add smoke flavor.
Let me point out a massive benefit to smoking your turkey, outside of the fact that it will taste amazing. By cooking outside, you free up kitchen space, including the oven, so you’ll have less stress when preparing your sides along with the rest of the meal.
Easy To Follow Steps To Smoke A Turkey
These 20 steps will walk you through the entire process. If it seems like many steps, that’s because it is. I did this for a reason. I work more efficiently when I have lots of simple-to-follow steps laid out. If you have questions that aren’t answered in this article or any advice, please contact me.
Step 1: Supplies Needed To Smoke A Turkey
Before you get started, make sure you have everything on this list.
- Turkey – fresh or thawed by the day of the cook.
- Wood Pellets
- Poultry Shears or Sharp Knife (if you spatchcock the turkey)
- Drip Pan for Gravy
- Probe and/or instant-read thermometer
- Fat Separator
- Wet Rub – oil, herbs, and spices
- Ingredients for the Gravy
Step 2: Choose Your Turkey
Should You Choose a Fresh or Frozen Turkey?

I would buy a flash-frozen turkey at the slaughterhouse over purchasing a so-called “fresh” turkey.
According to the USDA, a “fresh” turkey cannot be taken below 26°F. The USDA inspectors even allow a 2°F differential meaning that a “fresh” turkey can be stored at 24°F and still be considered “fresh.” This is a bit deceptive to the general public, who believe their turkey has never been frozen.
When a turkey freezes, the ice crystals that form puncture the cell walls of the proteins. This allows moisture to escape, which is why you find a reddish liquid, called a purge, inside the turkey bag after you thaw the bird. We prefer this liquid to be inside the turkey, but we’ll add it to the gravy pan, so it doesn’t go to waste.
To get a genuinely fresh turkey, you need to find a butcher or farm like an Amish-family-owned farm who will prepare the turkey on the spot when ordered, give you a pick up date to ensure your turkey is fresh, or they will store the bird between 32°F and 38°F—side note regarding buying a freshly slaughtered turkey. Rigor mortis usually sets in within an hour or so after the turkey dies. It doesn’t go away until about 12 hours later, so you will need to wait 24 hours before preparing the bird after it’s been slaughtered.
Keep in mind that fresh meat doesn’t stay fresh. If you buy a recently butchered bird, make sure it hasn’t been more than a week from the time it was butchered to the time you cook it.
Learn About the Labels on a Turkey

- A turkey with the label “Young Turkey” can be either sex and less than eight months old. The label “Fryer-Roaster Turkey” is of either sex and an immature turkey younger than 12 weeks old.
- Turkeys labeled “basted,” “self-basted,” or “enhanced” have been injected at the factory with a salt solution and perhaps flavor enhancers and tenderizers.
- A turkey labeled “Kosher” has been salted both inside the cavity and outside. It was once believed that this would draw out the unclean blood during ancient times.
- The label “free-range” on a turkey legally means “Producers must demonstrate to the Agency (USDA) that the poultry has been allowed access to the outside” (I added parentheses). In reality, all a farmer needs are to leave a small door open to a pen leading to the outside. Whether or not the turkey actually ventures out or not doesn’t matter.
- The label “pasture-raised” has no legal definition.
- The label “natural” also has no legal standing. It’s nothing more than a marketing term to sell more products.
What size of turkey should you choose?

Don’t smoke a turkey over 15 pounds because a large turkey will take too long to get the thickest part of the breast to 165°F. This leaves the outer part of the turkey well overcooked.


![Personalized Funny BBQ Gift Mug, Don't Worry I Got This I Watched A YouTube Video, By [NAME], Gift For Men, Gift For Dad](https://i.etsystatic.com/39088648/c/2982/2368/0/27/il/cf62b0/5272771721/il_170x135.5272771721_pz0h.jpg)

![Personalized Science Apron, [NAME] Uses [Pronoun] Smoker Periodically, Science Gift For Teachers, Gift For Dad](https://i.etsystatic.com/39088648/c/2982/2368/0/9/il/6bf723/5272542103/il_170x135.5272542103_18nf.jpg)

Step 3: Make a Plan or Plan to Fail
To smoke a turkey, you need to plan to start your smoker 5 hours before you’re ready to eat. We enjoy an early dinner for the holidays. If we plan on eating the turkey at 3:00 pm, I’ll turn on my pellet grill at 10:00 am.
If you want to get a head start, I’m always one to do this. The day before, prepare the rub if you’re making it from scratch, injection ingredients, and add everything, except the turkey parts and liquids, to the gravy pan. Place the pan in the fridge.
Step 4: Thaw Your Turkey Before You Smoke Your Turkey
If you plan on thawing the turkey in the fridge, allow 24 hours for every 4 pounds. For example, if you have a 12-pound turkey, it will take three days to thaw. I like to give an extra day or two to be on the safe side.
How to Thaw a Turkey
- Leaving the turkey still in the bag it came in, place it in a large roasting pan, then place the pan inside your refrigerator.
- Plan on it being in the fridge for 24 hours/pound of turkey.
- If you don’t want to calculate how long, have it in the fridge for one week, and you’ll be good.
By placing the turkey in a pan, you’ll catch any liquid that might leak out of the bag. For every 4 pounds of turkey, allow 24 hours in the fridge minimum.
Step 5: Prepare Your Gravy Pan
I’m a fan of the gravy recipe from Amazing Ribs but I made some tweaks that add more poultry flavor.
Turkey Gravy Ingredients
- 2 quarts water
- 1-quart chicken broth
- 1 cup apple juice or apple cider
- 2 onions, skin on, ends removed, cut into quarters. (When it comes to the onion, keep the skin on. The skin has a pigment that will turn the gravy a nice color).
- 2 medium carrots
- 1 rib of celery, leaves and all
- 1 tbsp dried sage leaves, crumbled (do not use powdered herbs since they can cloud the broth)
- 2 whole dried bay leaves
- 1 tbsp dried thyme leaves
Turkey Gravy Directions (steps 2-3 can easily be done the day before):
- Make sure you use a large enough pan to catch the drippings from the turkey and hold all the ingredients. I use this pan to thaw the turkey as well.
- Roughly chop the onions, carrots, celery into large pieces and place them in the pan. You can do this the night before, then add the liquid the day of the cook.
- Add the sage, thyme, and bay leaves into the pan and place them in the refrigerator. Store in there until you’re ready to use it.
- After the turkey has thawed, pour the juice inside the bag into the pan.
- Pull out the bag with giblets and the neck from the cavity. Put the neck in the pan. In the bag, you’ll usually find a heart (looks like a heart), the gizzard (looks like two marbles connected), and the liver (a floppy and shiny thing). Put it all in the pan except the liver. You can always fry the liver and feed it to the dog.
- Cut off the flap that covers the turkey’s rear and trim any excess skin and fat from around both of the cavities. Put it all in the pan. Now cut off the wing tips at the first joint and toss them into the pan as well. You don’t need to worry about any added fat in the pan. You can skim it later. If you are spatchcocking the turkey, take the backbone, rinse off the brown organ meat, and place the backbone into the pan.
- DO NOT ADD SALT. The drippings will add salt to the gravy. If you need to add salt, you’ll do it at the very end. More on this later.
- Add the liquid into the pan. Tip: Don’t add the liquid until you have the tray in your smoker. It’s much easier moving the tray from the kitchen to the smoker if you don’t have it full of liquid.
You can do most of these steps the night before if you want to spread out the steps.
Step 6: 3 Options For Your Turkey – Whole, Parts, or Spatchcocked

Option 1: Traditional whole turkey
Traditional turkey is a turkey that isn’t spatchcocked or broken down. Cooking a whole bird looks great but leaves you with the least juicy and tender meat of all the options. I don’t recommend this option if you smoke a turkey. Do not stuff the bird or put anything in the cavity if you go this route. When you load the cavity with food, it takes the heat a lot longer to reach the center of the stuffing, causing the turkey meat to get overcooked. Also, don’t add aromatics. When you leave the cavity empty, the heat circulates more evenly, letting you smoke the bird faster and with added flavor. Also, do not truss or tie the legs and remove the widget holding the drumsticks together. It’s preventing them from cooking correctly because it’s keeping the thighs and drums tight to the body. Many books tell you to truss the drumsticks, but that is wrong. Please don’t do it.
Option 2: Turkey cut into parts
This is a great way to smoke your turkey. Since it cooks faster, you are left with moist meat. As a bonus, you can remove each piece once it has reached the desired temperature. This is 160°F for the breast, 170°F for the thighs and drums.
The best way to smoke your turkey pieces would be to place them skin-side up on the grates. Once the meat reaches 150°F, turn them over to be skin-side down. If you have the option to “slide & grill” or cook over direct heat, do that. Otherwise, crank up the temperature to 375°F to crisp the skin. Another option would be to transfer the meat to a gas grill to cook over direct heat if you have that option.
The drawbacks of doing this method are two-fold. First, you don’t have a whole bird to present to your guests. However, this is overrated since you probably carve the turkey before sitting down at the dining room table. Second, this will require a bit more cooking surface area. If you have the room, then there’s no problem.
After separating the breast, thighs, and drums, cut down the rest of the carcass to put in the drip pan for the gravy.
Cooking instructions for turkey cut into parts
- Preheat the smoker to about 325°F.
- Place the drip tray with all your gravy ingredients under where you’ll have your turkey pieces.
- Begin by adding the thighs and breasts first.
- After about 15 to 20 minutes, add the wings and drums.
- Use an instant-read thermometer to keep a close eye on your meat. Make sure to check the temp more frequently once the meat nears 150°F.
- Once the meat reaches 150°F, flip it over and cook over direct heat to help crisp the skin. If you don’t have that option, crank up the smoker’s temp. You can even spread on a sauce at this point.
- Remove the breast and wings when the thickest part reaches 160°F, and the rest of the meat hits 170°F.
- Everything will be cooked for around 1.5 to 2 hours since this method cooks the turkey faster.
Option 3: Spatchcocked Turkey

This is my go-to method of smoking a turkey. It looks great, and you get juicy, tender meat since it cooks faster than if you left it as a whole bird.
This method allows you to brown and season on both sides, enabling great flavor to get all over the bird.

When breasts are done, the thighs will be done as well. This is tough to do when smoking a whole bird. You typically want the breasts about 10°F lower in temp than the thighs. Since the thighs are thinner, this happens naturally when you smoke a spatchcocked turkey.
The turkey is easy to carve. The thighs come off with one easy cut.
How to spatchcock a turkey
- Make sure you’ve removed the neck and bag that has the gizzard and liver from inside the cavity.
- Flip over, so the bird sits breast-side down.
- Using sharp kitchen shears, cut down along both sides of the backbone.
- Pull it out and flip the bird over.
- Press down with some force on the center of the breast until you hear a cracking sound. Now the breast will be lying flat.
- When placing the bird on the grill, you can tuck the wing tips behind the wings, but I prefer to cut them off and throw them into the gravy pan. I do the same with the backbone after a good rinsing.
Step 7: Brine Your Turkey Before You Smoke
When you are going to smoke a turkey, brining it is a great option. The brining lets the salt change the cellular structure and helps the turkey retain a lot of moisture while cooking. The meat will also vary slightly. Some people think the meat gets too soft and they like more chew. The best part of smoking a turkey is playing around with lots of options to find what works best for you.
Check the label – Best turkey to brine
Before you brine, check the label on your turkey. If it isn’t labeled with “enhanced,” “Kosher,” “Basted,” “self-basted,” or “brined,” you’ll want to help the meat proteins to hold in moisture by doing a dry brine. If your turkey has been brined already, you can skip this step.
A popular option is doing a wet brine. If you go with a wet brine full of ingredients, the flavors won’t penetrate the muscle. I suggested several ingredients with water and apple juice, but this was a waste. I choose to do a dry brine.
The right amount of salt added will be a game-changer.
How to dry brine your turkey
- Sprinkle the skin with about 1/4 to 1/2 teaspoon of kosher salt per pound. Only do this if it has not been injected or koshered previously.
- Rub this mix all over your turkey
- Leave the turkey sitting in a pan inside your fridge overnight or for up to 24 hours.
- Place in the fridge uncovered so the skin can dry well.
- The next day, rinse off the turkey and pat dry.
Step 8: Inject the Turkey
Most likely, your turkey was injected with a saline solution at the factory, but you still want to amplify your bird’s flavor by injecting it with either oil or butter. You could decide to inject all sorts of spices and liquids, but this will detract from the taste of the meat. When you smoke a turkey in your pellet grill or any smoker, injecting will help intensify the flavors.

How To Inject the Turkey
- To get the injection ready, melt some butter over low heat in a small saucepan. You can be liberal with the amount you inject.
- If you decide to use an oil such as olive, avocado, or other oils, skip the first step since you don’t need to melt the oil.
- Add any additional ingredients you’d like to incorporate to the injection and stir until well combined.
- It’s most important to hit both breasts, but the thighs and drumsticks don’t hurt either.
- If using butter, don’t inject into a cold turkey but wait 20 – 30 minutes into cooking to inject the bird.

Tip: When you inject butter into a cold turke,y it clumps and clogs the needle. Wait until the meat is about 90°F, or past the melting point of butter, and then inject. This will be during your cook and will work out great.
Step 9: Apply a Rub
You can either go with a dry or wet rub, but I prefer a wet rub when smoking a turkey. A dry rub is when you mix spices and herbs and rub them into the meat. I like a wet rub that adds oil to the spices and herbs. You want to add oil to the outside of the bird in any case since this helps it brown and look fantastic! So you either add oil to your spices and herbs then rub it all over the bird. Or, you take your mixture of spices and herbs, rub it all over the bird, then drizzle oil over the meat.
Either buy a rub that’s ready for you to use or make a blend of herbs and spices you can combine at home. You’ll then rub this mixture under and on top of the skin. The spices can penetrate the meat and add additional flavor by rubbing this under the skin.
When using your rub, keep in mind not to use a rub with a lot of salt if your bird was salted at the factory orused salt in a dry brine or injection.
Steps to doing a wet rub:
Ingredients:
- 4 tbsp of rub mixture
- 4 tbsp vegetable or olive oi
Directions
- Pat dry the turkey with paper towels. Seasoning dry turkey skin will help ensure crispy skin.
- Mix the rub and oil together.
- Now gently work the rub under the skin of the turkey breast, making sure to cover all the meat. Be careful not to break the skin. With your fingers, you’ll gently work your way between the skin and the breast meat. Spread it out as much as you can. Do this for the thighs and legs as well. Avoid leaving large clumps, making it an even coating.
- Rub the rest of the mixture on top of the skin.
- Toss any leftover rub into the gravy pan.
For a dry rub, please do the same steps but before you apply the dry rub ingredients, spray the bird with oil or lightly rub it with oil before you add the rub. This will help the skin brown.
Using a rub with sugar can add a nice sweetness to the flavor. Just be aware that the sugar will cause the skin to get dark and become caramelized.
I’ve found several favorites online, but for a homemade blend, I’m a big fan of the rub found at amazingribs.com. Here’s a link to their rub recipe.
LINK TO AMAZINGRIBS.COM RECIPE
Another excellent option to consider is the rub from HeyGrillHey. She calls it the perfect combination of BBQ flavors and herbs. Just combine the ingredients in a bowl and mix well to break up any chunks. You can use it right away, or you can store it in an airtight glass container for up to a month. I like making it ahead of time, so I have one less thing to worry about when the smoking time approaches.
Step 10: Wood Options For Smoking a Turkey

I suggest using any of the following when smoking a turkey. These woods won’t be too strong and overpowering to turkey meat.
- apple,
- alder,
- peach,
- cherry, or
- oak.


I suggest avoiding mesquite, and hickory which can be too strong for this type of meat.
Step 11: Setting Up Your Smoker To Smoke a Turkey & Make Gravy
When using a pellet grill to smoke a turkey, you have a couple of options.

Option 1: Place your turkey on the upper rack, then have your drip pan on the lower shelf directly below the turkey. Suppose you don’t have the room to place your turkey on an upper rack; use option 2.
Option 2: Begin by removing the lower rack and placing the gravy pan on the smoker’s drip pan. Then replace the lower rack for the turkey to go on. Keep a close eye on the gravy pan. Since it will rest at an angle, you’ll need to make sure there’s plenty of liquid, so the level doesn’t fall below the bottom of the pan on the side that’s higher.
Step 12: Start the Smoker
- Set your smoker to 325°F.
- If you can choose your smoke level, I’m a fan of low to medium smoke settings when it comes to turkey. Too much smoke can make the turkey taste a bit ashy.
If your smoker doesn’t have a separate smoke setting option and it does its best smoking around 200°F, begin smoking your turkey at 200°F for 30 minutes. Then increase the temperature to 325°F.
Tip: Before you put the bird or drip pan into the smoker, clean the grill grates.
Step 13: Put the Turkey and Gravy Pan into the Smoker
- Place the turkey into the smoker breast side up. If possible, place the turkey 2 to 3 inches above the drip pan.
- After everything is in the smoker, insert a probe thermometer. This is a leave-in thermometer that you will insert into the thickest part of the breast. Make sure not to hit the ribs. With the thermometer in your bird, you’ll be able to keep a close eye on your progress.
Step 14: Smoke the Turkey
- When you smoke a turkey, don’t check on it for an hour. At the hour mark, look at the drumsticks and wings. If they look nicely brown, cover them with tin foil.
- To do this, coat one side of the foil with oil, then wrap it around the drums and wings. This will help them from burning.
Step 15: Check Internal Temperatures
If you didn’t leave in a probe thermometer, you’d want to spot-check the meat after the first hour.
- Check the breast by pushing in an instant-read thermometer to just past the center of the thickest part of the breast. Now slowly pull it out while looking at the temp readout. The lowest temperature is the number you’ll go with.
- Spot-check the meat occasionally. Don’t be concerned about poking the meat several times to keep checking the temp. The bird is about 70% water, so a few drops leaking out won’t cause it to dry out.
- When you approach 160°F, make sure you spot-check the bird all over, especially in the back, which can take longer to cook and even be a little soggy. This is due to it being close to the gravy pan. The liquid will be cooling the air above it, which can cause the underside of the turkey to cook slower. If this is the case, remove the pan. It’s preferred to cook over direct heat using a slide and grill option on your smoker. If you don’t have that option, make sure your turkey is placed on the lowest rack and directly in the middle. Getting the underside cooked should only take 20 minutes, give or take, so keep an eye on it.
- Use a probe and instant-read thermometer to monitor the bird’s internal temperature. You need to make sure it isn’t overcooked. If the turkey came with a plastic popup, throw it away. Those are inaccurate and often set 20°F too high.
- It’s time to remove your turkey once the breast and wings have reached 160°F and the thighs and drums are at 170°F
Many still think that 170°F to 180°F is the safe temperature range to hit, but the USDA revised its guidelines in 2006. As such, many cookbooks are out of date.
Step 16: Check on the Gravy
- Add boiling water if the liquid is getting low in the gravy pan. Make sure there is always at least 2 inches of fluid in the pan at all times.
- Don’t let the onions or any food inside the pan burn. They can brown, and that’s okay, but you don’t want them burnt.
- Once the internal temp of the turkey approaches 160°F, tilt the bird to drain any juices inside the cavity into the gravy pan. If you are doing a spatchcocked turkey or cutting it into pieces, you can skip this step.
Step 17: Remove from Smoker
1. Remove your turkey once the breast and wings have reached 160°F and the thighs and drums are at 170°F
Suppose you are having trouble maintaining a 325°F smoker temperature because it’s cold and windy outside, or for some other reason, you can move the bird and gravy pan into your indoor oven. If you foresee this occurring, preheat your oven to 325°F, then move the turkey and pan into the oven once it is ready. Don’t stress about doing this option. The smoke flavor has already been added to the meat, so focus on not overcooking it.
A great option after your breast reaches 160°F, take the turkey off the grill and remove the legs and wings. Now put those back on the grill on a higher heat to finish off. If you can grill over direct flame, great. If not, raise your temp to about 400°F and finish the dark meat. This might only take about 10-20 minutes.
Step 18: Rest Turkey
- After you smoke a turkey, remove it, place it on a cutting board or large dish, preferably with a lip to catch any juices that runoff. These can then be added to the gravy.
- Do not do a foil tent. You will lose the crispiness of the skin. You’ll be giving the turkey enough time to rest during the move from the smoker until you carve.
- Resting for 30 minutes before you carve is enough time. Don’t worry about your meat getting cold. You’ll be serving it with piping hot gravy.
If you are traveling with the bird or have a bit of a wait until serving the meal, you can use a faux cambro to keep it warm for a long time. For a faux cambro, I wrap the turkey in butcher paper, then a towel before placing it in a cooler and shutting the lid. This will keep your food hot for hours. You will lose the crispy skin, but the flavor will remain.
Step 19: Make the Gravy

You are probably familiar with the thick starchy gravy commonly made to serve with turkey. Instead of doing that, let’s make a thinner, more flavorful gravy. By having a thin gravy, you’re allowing it to penetrate between the muscle fibers instead of sitting on top of the meat like a lump. By serving hot thin gravy, you can use it to warm your turkey if it has cooled. You can always save some of the gravy to turn into the thick goo if people wish to have the traditional option.
Steps to follow:
- Take the pan and pour the liquid through a strainer to remove any solids. Discard what’s left behind. There’s nothing left for it to do.
- Now, let it sit for 10 minutes so the fat can rise to the top.
- Separate the fat either by using a fat separator that you can buy online or at your local store. You can also remove most of the fat by skimming it off the top using a large spoon or basting bulb.
- Now taste the juice which should be rich and flavorful. If you find it too weak, simmer it in a pan to cook it down a bit, then taste again.
- If you decide to add salt, make sure to do it at the end. You could make the gravy too salty by adding salt before reducing the liquid.
Tip: You can store your hot gravy in a coffee carafe until you’re ready to serve. You can either do it right out of the carafe or transfer the gravy to a gravy boat or serving bowl.
Now, if you want to thicken your gravy go ahead. However, serving it thin will let the gravy and its incredible flavors penetrate the fibers of the turkey.

How to thicken your gravy with a roux:
- Take 4 tbsp melted turkey fat and/or butter and put in a saucepan.
- Add 4 tbsp of flour (making the ratio 1:1) to the same saucepan. (Flour tastes better than using cornstarch if done right).
- Place the saucepan on the stove over medium heat.
- Whisk the flour and butter/fat until it’s smooth.
- Keep whisking until it begins to turn pale amber—about 3 minutes. (Browning cooks the flour, killing the pasty flavor).
- Optional: Cook it longer to make it richer by letting it get darker. Don’t let it turn brown.
- Slowly pour 1 cup of liquid from the gravy pan into the roux, making sure to whisk over medium heat while you pour. Keep whisking until it thickens, and there are no more lumps
- Taste the gravy.
- You may want to add another cup of liquid. Probably no need to add any salt or pepper.
Step 20: Carve Turkey
If you spatchcocked the turkey, cutting off the thighs and legs will be easy.
- Take the wings, drums, and thighs, remove the skin, and chop up the meat.
- Chop up the skin separately and mix it into the wing and thigh meat.
- To slice off the breast, run your knife along the central breast line until you hit ribs, then turn your knife and slice along the ribs until the breast is removed. Repeat for the other breast.
- Now, slice the breast meat into the size of slices you prefer.
If you enjoyed this recipe and how-to article, read Smoking a Turkey – Frequently Asked Questions.
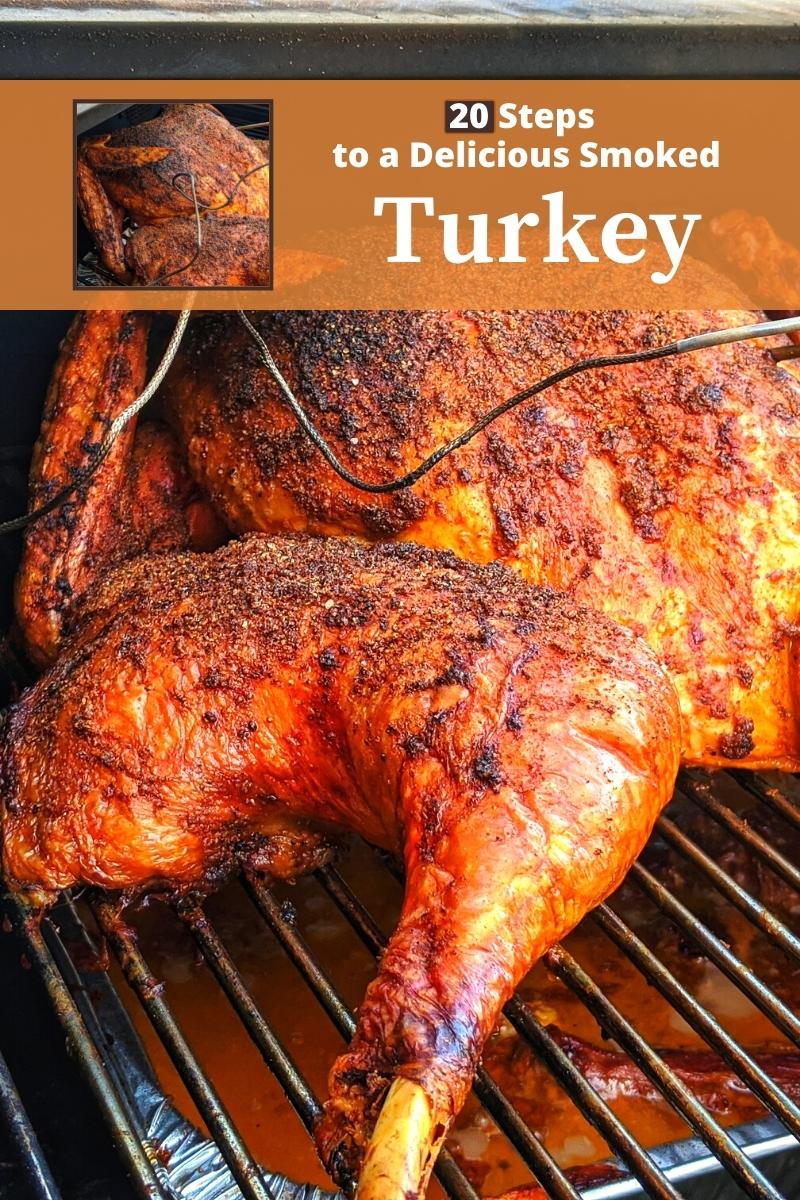
Below is a Pinterest friendly photo…. so you can pin it to your Smoking Food Board!!
